Ring Group Automation test
With Endpoint Admin’s newest feature Ring Group Automation (RGA), you can easily manage and control Windows Update for Business (WUfB) and WIN32 apps deployment in Microsoft Endpoint Manager. In this article we will go through Endpoint Admins Ring Group Automation, the reasons why we create RGA, how does it work and step-by-step to implement it using Endpoint Admin.
Backstory – why use RGA in the first place?
Microsoft is investing heavily in cloud-based solutions and this means that on-premises solutions will be phased out to a greater extent. This also comes to device management and therefore, more and more companies are embarking on their journey towards the cloud and all the benefits that come with it. To kick-start this transition, Microsoft has developed the concept or terminology called “Co-Mangement” where devices have the SMS Agent and Intune agent installed at the same time and where sub configurations in the form of workloads from ConfigMgr can be moved in phases to be managed in Microsoft Endpoint Manager (Intune) instead. Co-Management will not be covered in this article, but you can read more about it in Microsoft docs. What is interesting about this technology is that we can move Windows patching to the cloud as a stand-alone element.
For handling mobile devices and desktops, Microsoft Endpoint Manager (Intune) is the way to go and is a technology under strong development. WSUS with SCCM, which many system administrators have used for patching PCs, is not an option in the future. For a replacement, Windows Update for Business (WUfB) is the solution. You can read more about WUfB here Microsoft docs.
There are many pros and cons between the two technologies – to boil it all down – WUfB with Endpoint Manager does not share the strict control that you get with SCCM with in-depth reporting and limitation of patches to computers using collections and where you distribute patches. But WSUS, on the other hand, is a heavy and old technology that will most likely not be developed much further.
Another challenge with WUfB is that all updates come from the cloud and you will put a lot of pressure on your WAN line if you do not make your rollout in phases. Especially in large enterprises with thousands of devices. This is exactly the the challenge RGA can solve.
“So how do we stay control when we move the workload from WSUS to WUfB?”
As stated in the Microsoft docs we can only limit patches and control the rollout on the client using CSP profiles to defer or pause updates – bummer… that means we must segregate devices into groups like collections in SCCM to control the configurations on the clients and stay in control and do phased rollouts.
How does RGA work?
In Endpoint Admin you can create a ring group automation profile (RGAP), with the desired configuration. A RGAP consist of a desired number of rings, scope, exclude, detection interval and prefix.
- A ring consist of device-only security group in Microsoft Entra ID. It is only device-groups because of limitation in the Intune assignment engine as it does not support include/exclude of mixed user and device groups.
- Each Ring can be divided into a desired number of subgroups to support staged rollout and limit WAN utilization.
- You can add both user-based or device-based groups to a ring. When a user is added to a ring, it is the user’s primary devices from Microsoft Entra ID which are added to the ring.
- RGAP Scope: The scope can be global, meaning all devices in the Microsoft Entra ID. Or you can select a group. If you use a group as a scope, only devices which are a member of the scope will be affected by RGA.
- Exclude: Groups can be excluded from the RGA. All devices and user’s primary devices which a member of a group added to exclude, will not be affected by RGA.
- Device objects can only be a member of one ring.
- A user can use the Endpoint Admin shop, to move their devices into a different ring.
- RGA will automatically create a “Final ring”. All devices in the scope for the RGA will automatically be added to the final ring, if their are not a member of any other ring in the RGA.
- Detection interval is how often the RGAP should be executed and update ring membership.
- Prefix: Groups create by the RGAP will be prefixed with the given prefix.
How to create a ring group automation profile?
In this section we will show examples of how to create an RGAP and how to utilize it.
Global RGAP example
In this example, we will create a RGAP using the scope global to affect all devices in our Tenant. We create 3 rings and RGAP will automatically add the final ring.
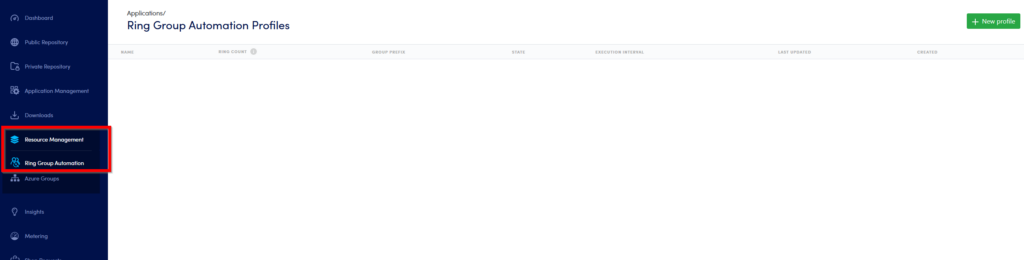
- In Endpoint admin under Resource Management, select Ring Group Automation:
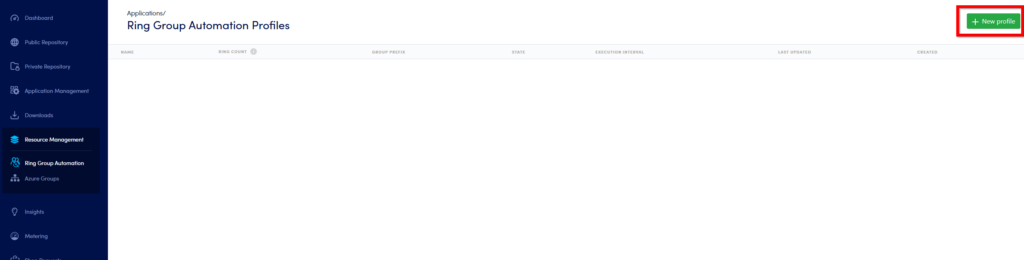
- Select New Profile in the top-right corner:
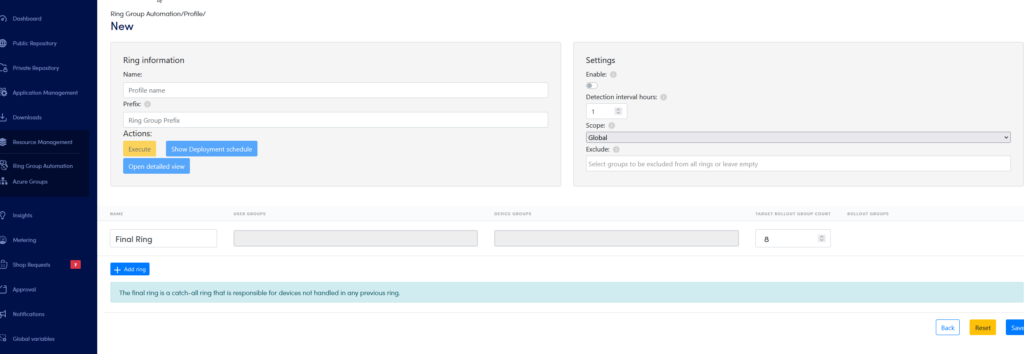
- The New RGAP page will look like this:
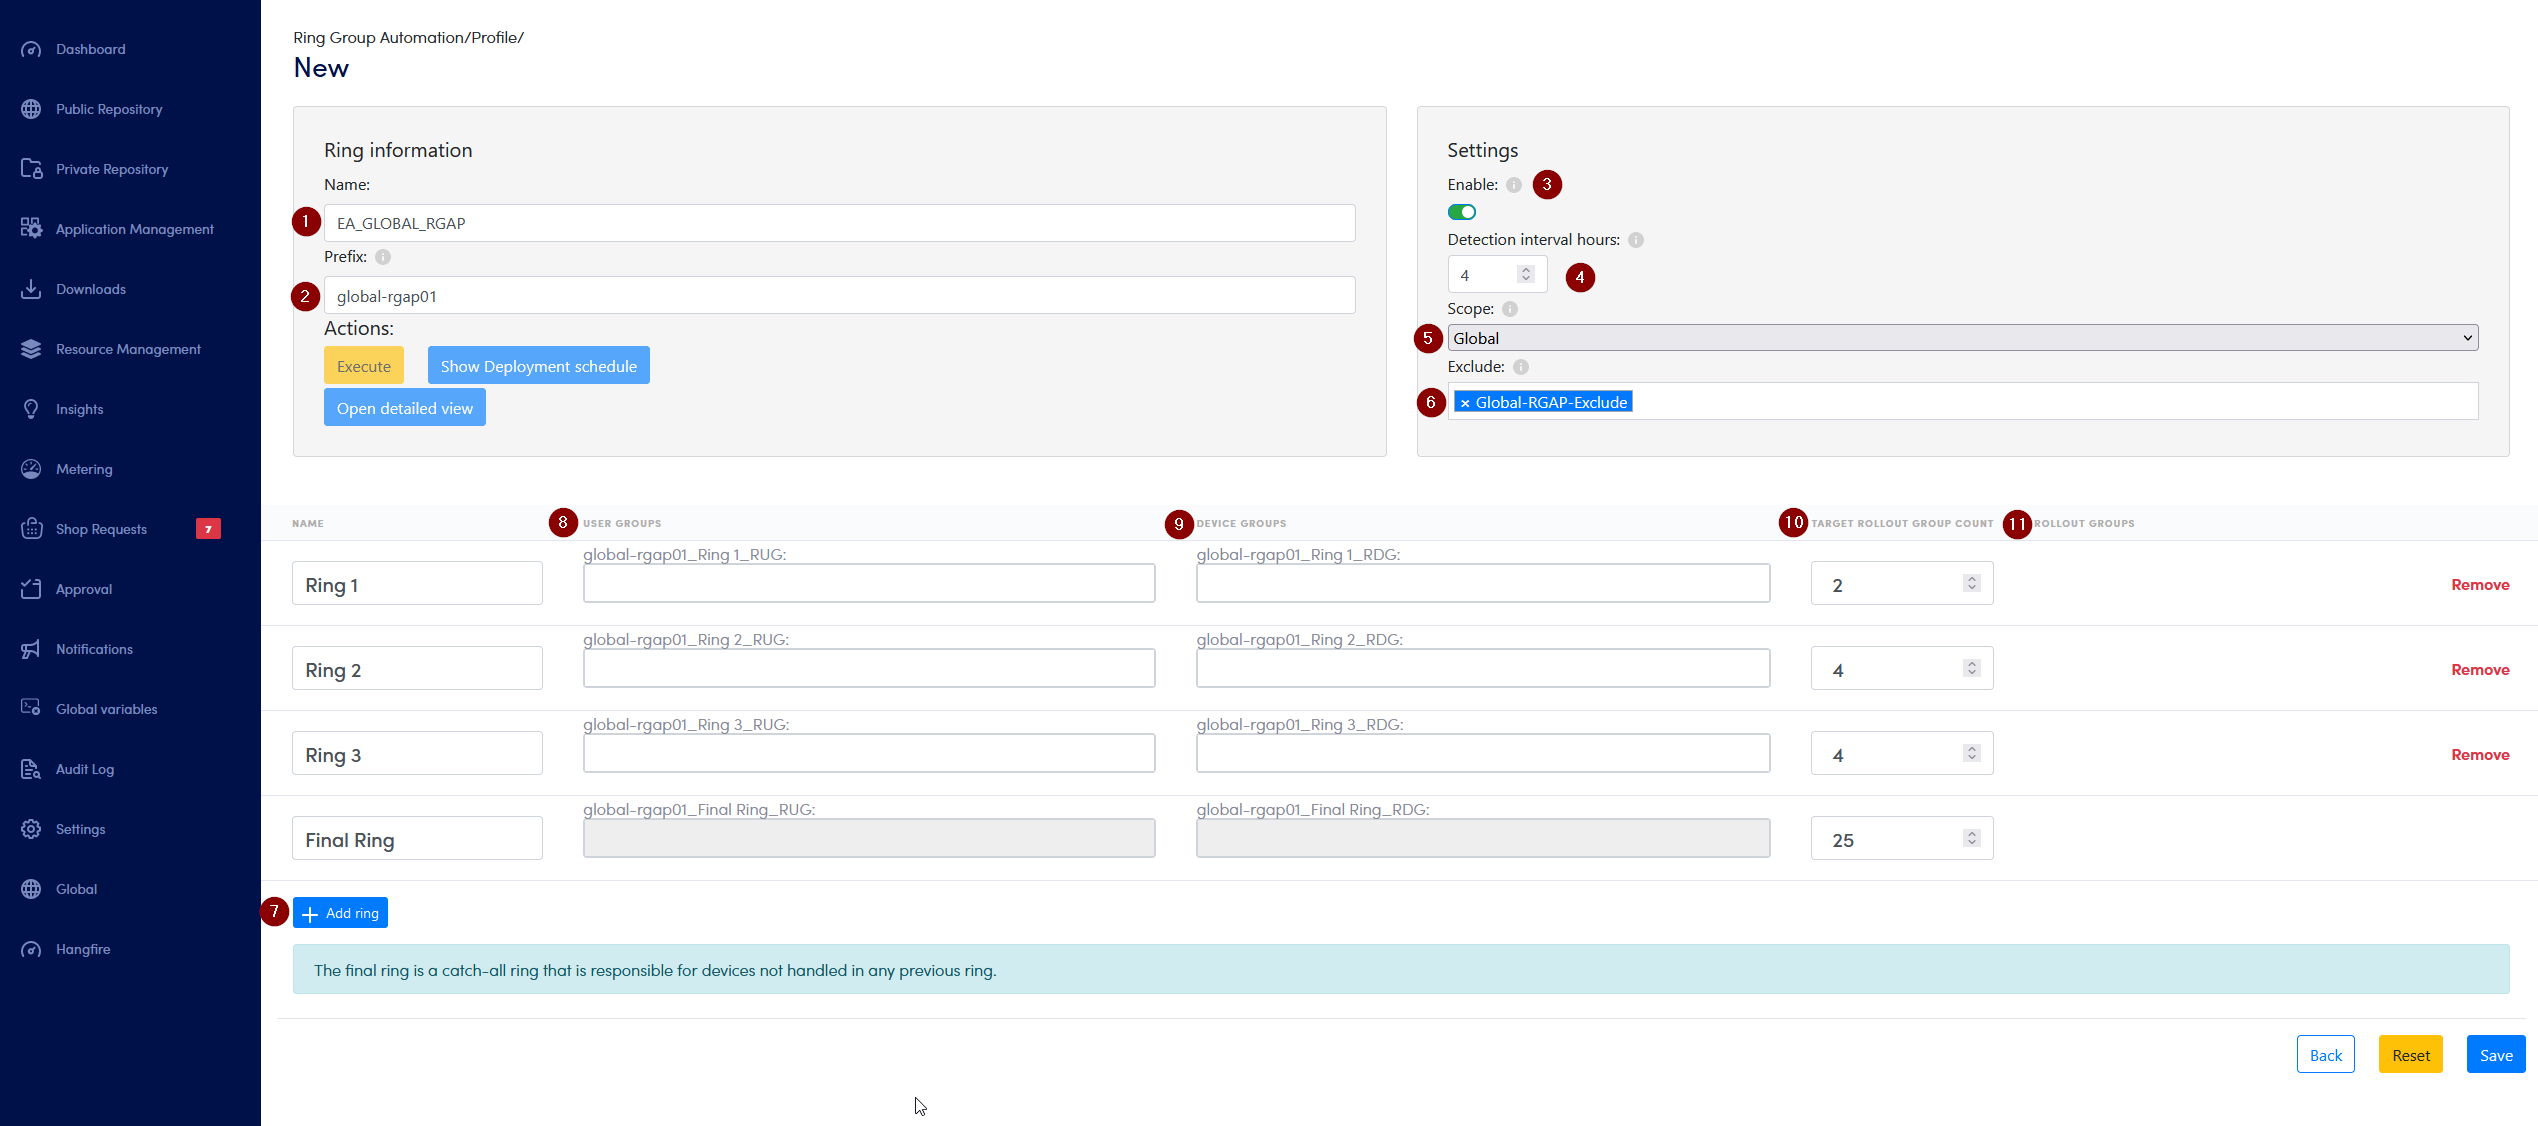
- Now we will configure the RGAP:
- Name of the RGAP.
- Prefix for the groups that will be created by the RGAP.
- Enable the RGAP.
- Detection interval, in this example the RGAP will run every 4 hour.
- Scope of the RGAP. We use Global, meaning all devices will be affected by this RGAP.
- Exclude: Here we have added the group Global-RGAP-Exclude. All members of this group will not be affected by the RGAP.
- Add ring, clicking this button will add a ring. We have added 3 rings. Remember the final ring is automatically added to RGAP.
- User Groups: Here we can add groups with user-based membership to each ring.
- Device Groups: Here we can add groups with device-based membership to each ring.
- Target Rollout Group Count. Use this to choose the number of device sub-groups the ring should be divide into.
- Rollout Groups: When the RGAP have run once the rollout group can be seen here.
- In the next step we have added groups to Ring 1-3:
- In Ring 1, we have added the user-based group “IT Department” under User Groups.
- In Ring 2, we have added the device-based group “Device Test” under Devices Groups.
- In Ring 3, we have added the user-based group “All IT Managers” under User Groups.